Tuesday, August 21, 2012

Best Fitness Equipment in the Industry?

Rogue Fitness Equipment is arguably some of the best on the market. Manufactured in the good 'ol US of A, they are something of pioneers in a new/retro age. Most recently they have earned wider recognition in the Crossfit community as the sole supplier and fabricator of all things strength and steel at the Crossfit games.

If you haven't seen this event, contestants compete on Rogue pullup rigs that look like extended monkey bars for giants, sleds loaded with plates and creative endeavors such as using an orange sledgehammer to slam a block on a track a set distance for time.

Rogue has tons of great equipment for everything from Crossfit to Strongman competitions to gymnastics. All of this simply means they are a great resource for setting up an amazing home gym.

In fact, a lot of their fitness equipment is designed to fit in a garage. Taking a cue from this hardcore equipment line, here are some of our favorites and some alternatives for the budget-minded. We chose these for a full body workout in a limited space:

Kettlebells, Medicine Balls and Battling Ropes:


So the battling ropes may be tough if space is limited. However, if you have a garage, open the door and roll out these bad boys.

Used with a partner or attached to an anchor point, these are an intense workout and should last a lifetime. Unless you set them on fire or sonething…


On the other hand, kettlebells take up little space and are so versatile! These off-balance weights can build cardio, muscle and of course strength. 

To start with buy 1 or 2. Add to your collection as you get stronger. The starter weight recommended for men is 40+ lbs. and for women 18-26 lbs. But you know how much you can handle. Get a solid weight you can handle to start out.


Medicine balls designed for slamming are a lot of fun and a great workout. These are easily stacked in a makeshift rig or shelf and 3 different weights goes a long way. Buy a lighter ball, 4-8 lbs. a moderate weight, 9-12 lbs. and a 14-16 lb. ball if you can handle it. Just remember, at some point a medicine ball can become too heavy and is just another weight. Be sure you can throw it and/or slam it.

Rogue offers Dynamax medicine balls (shown below,) which are arguably top of the line. Click here for some great medicine ball bargains:  Medicine Balls for Workout Routines Anywhere


So there you have it! Some great workout equipment everyone should have in a hardcore home gym. Before people start screaming about power racks and pullup bars I should mention that I will be exploring these game-changers in a follow-up post. For now, get shopping and push your body to it's potential-and beyond!

Check out these great links:

Rogue Fitness

TRX and Kettlebells


Monday, June 11, 2012

They Build Muscle,Strength and Cardio and They’re Cheap and Compact?


Strong enough? (xbradtc.wordpress.com)


You have to wonder about these kinds of claims. After all, what muscle building/fitness program doesn’t promise to get you into the best results of your life? I can’t think of one.
This post isn’t about a program, though. It is about compact, inexpensive equipment that works. 
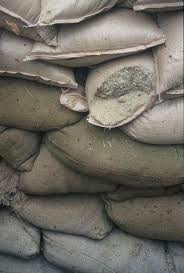
Enter the sandbag. Just not the ones you’re probably thinking of. Expensive sandbags built to get run over by a train and not bust a seam are great, but they cost quite a bit of money. We can get the same results with a little imagination and even less money. 
Pure Homemade Sandbag
The homemade sandbag is easy to make and doesn’t cost much. Here is what you need:

  • Two or more small trash bags (depending on how many weight options you want.)
  • One sturdy duffle (small to medium, depending on weight.)
  • Duct tape
  • Sand

The process is simple. 
-Divide sand into small trash bags, or put unopened sandbag in and tie it up. 
-Seal opening after tying with duct tape. Place the whole thing in the second trash bag and tie around outside of bag until package is tight. 
-Place inside duffle and get to work!
If you don’t have a duffle or prefer to use something extra sturdy, buy real sand bags and one of the handy canvas duffles below. Nothing beats this combo for toughness and price, and the finished product is comparable to professional sandbag system.

First, buy a set of these sandbags:


Next, choose one or more of these inexpensive, sturdy duffles:


This is great sandbag setup and an inexpensive one at that. Add to this the tough handles on these bags and they are a great alternative to spending $100-200 on a specialty bag.


The Semi-Homemade Sandbag


If you prefer lighter bags or more and easier weight changes, semi-homemade is a great option. Basically, you buy smaller industrial use sandbags and either use them by themselves, or place as many as you need inside a duffle bag. 


First, choose your ready made canvas sandbag:


This option gives you professional quality industrial use sandbags that seal tight. Place as many as you need inside a small duffle or use them by themselves. Each bag holds 20 lbs. of sand, so one set gives you up to 80 lbs. to workout with in 20 lb. increments. The price? Your duffle, about $10 for sand and $20-$30 for these high quality bags. Perfect.


______________________________________________________________


The Endless Budget


The alternative to both of these options is the sandbag designed specifically for training. One of the best on the market is from Josh Henkn's sandbag fitness systems. But it will cost you. A military grade shell that holds up to 80 lbs. starts at $130. 


Build Muscle, Burn Fat, Compact?


Yes! No matter which set up you choose, the sand can be removed, and anything can be used as filler. Plus, sandbags are easy to stack, which keeps them out of the way (and makes a handy chair!). 


Sandbags build muscle and strength! Sand shifts, forcing your muscles to work harder to stabilize it. Your whole body gets involved, burning more calories and using more muscles. 


Even better, you can take your sandbags anywhere and get a phenomenal workout. 


For all of these reasons, sandbags easily make our top ten favorites for inexpensive home gym equipment. Get yours today!


p.s. You can see more about sandbags by clicking on the links below:


Whole Body Functional Training

The Best Exercise you are not Doing

Cheap and Easy Sandbags


Monday, June 4, 2012


Hey You! You're an Intelligent Person, Right? Don't Believe the Hype!


Simple equipment and willpower are all you need for the body of your dreams.


Just when you thought it was safe to read mainstream fitness media (books, videos, articles, whatever) BAM!


You run into a paragraph like this:


                                         'You can do without going to a commercial gym,
                                          but it will take thousands of dollars to properly
                                          outfit your home gym...working out at home
                                          will eventually limit your exercise selection...'


NOOOOO! Don't believe the hype!


That short paragraph above was paraphrased from a best-selling trainer's book on developing the ideal male physique. A book which has a great message, by the way.


However, you can get a great workout at home, with endless variety, without spending thousands of dollars! If you are sufficiently self-motivated, you can even reach certain athletic goals.


In fact, it is my view that not only do you NOT need to spend thousands on your home gym (unless you want to) but simple, inexpansive tools can create just as many challenges that WILL stimulate muscle growth and help you build/condition your dream body, whether you are male or female.


The Valslide


Case in point, The Valslide, shown below, is deceivingly simple. How simple? It costs about thirty dollars, comes in a package a little bigger than your hand, and is basically a molded piece of pretty plastic for your feet (and hands, but we'll get to that in a minute.) 


When I said deceivingly simple, this is what I meant. There are a lot of exercises you can do with these for the whole body, not just your lower body.


Exercises

The Valslide lets you slide from side to side, backwards and forwards, on carpets, tiles or any suitable surface (if you have hardwood floors, use the booties below.) If you have ever seen the massive thigh muscles of Olympic speed skaters, you have an idea of how effective a workout this is.


(Serious quads) totallycoolpix.com


But I have found this to be an excellent upper body tool as well.  With the slides on your hands, planks become a full range of motion exercise that works the pectorals, anterior deltoids, lats, triceps and of course your entire core. Here is a short list I like to do:


  • Elephant Walkout/Caterpillar Walk (From standing, put your hands on floor and slide out as far as you can, then try to pull back to standing)
  • Elbow to Extended Arms Plank (Get in a regular plank position on your elbows. Slide the arms out to full extension and pull your elbows back towards your waist.)
  • Star Plank or Iron Cross Plank (The Star Plank is a plank with arms and legs extended out to the sides. Imagine sliding the arms together and back out to the sides with the Valslides on. Wow. The Iron Cross is the same with feet together.)


Why use sliders of any kind? Variety. Intensity. Price.


For the price, you can take your bodyweight training to the next level. Because let's face it, while there may be thousands of bodyweight exercises, sooner or later we just want something more! A toy to play with, one that adds a dimension of interest or difficulty to our workouts.


Sliders do just that, and they are perfect for the homegym, traveling workout, or for use in a gym group workout space. They are effective too, and require a small learning curve for you and your muscles, so...


Start Slow!


This is a different workout, so start slow. Do as many repetitions in slow, perfect form as you need to before picking up the pace. This is especially important when you are on your feet. You don't want a groin tear in your first slider workout!


The same is true when using sliders on your hands. The Star or Iron Cross plank and the other exercises listed above are advanced bodyweight exercises! Go into them with a slow cadence and only as far as you are comfortable with.


You Don't Need Thousands of Dollars for you Home Gym


Ok, if you are a bodybuilder, maybe you do. But simple and inexpensive equipment combined with hard work and dedication will take you very, very far towards a solid, muscular physique. One that is ready to play any sport and excel at it.


Expensive gym equipment is just not necessary unless you want it. Even the inexpensive Valslides have a cheaper alternative, and I would be remiss in not pointing it out. Enter the EZ-Move Furniture Sliders:


A four pack of slides designed to move heavy furniture on thick, plush carpet for less than $15 bucks. These are flatter and not as colorful as the Valslides, but they measure 9 3/4" inches long and 5 3/4" inches wide. 


The one drawback? They don't come in green, sorry. 


Don't be fooled, these simple tools are an intelligent choice. You will want to keep them in your gym bag, suit case or car at all times, right next to the resistance bands and suspension trainer! 


Remember, you determine the body you will have. Your hard work and dedication is the most effective tool you have, so keep the equipment simple. Get your sliders as soon as possible and have fun!


Take a look at some great bodyweight workout routines you can do with your sliders:


Bodyweight Daily


Check out another of our favorite 'smart' choices for effective home gym equipmet that won't break the bank:  


Resistance Bands for Endurance, Muscle Building and Power


Thursday, March 22, 2012

Weighted Bars for Shredding your Entire Core

One of the best exercises to tighten your abs and build a powerful core is standing in place and twisting from side to side. This movement is called the Russian Twist if you are seated and could be called an oblique crunch for all it does to develop these muscles. Whatever name this ab exercise goes by, it works best when holding a weight of some sort.

There are many ways to add weight to this exercise. Hold a medicine ball in both hands, use a light kettlebell or dumbbell, or the easiest way, use a weighted workout bar. You might have seen these at your local gym or the last time you were in a sporting good's store. These are straight, weighted bars from 5 to about 42 pounds, each with color-coded end caps and black rubber/foam.

Why not just pick up a barbell? For several reasons. If you workout at home, grabbing the correctly weighted bar  is easier and faster than maneuvering weight plates. Then there is the comfort. Most brands make solid steel bars with smooth foam padding; the perfect way to warm up and ease into a workout.   Depending on the weight you use, and your exercise goals, these bars are enough to do a complete workout routine.

One drawback to many brands is the foam bar padding. Countless reviewers noted that their new weight bar was scratched or cut easily. For this reason we recommend the Power Systems Weighted Aerobic bars. Unlike most competitors, the Power Systems bars have a durable rubberized coating, and come with a 2 year warranty.

Getting back to the 'oblique twist,' the weighted aerobics bar gives you at least three different options when performing this exercise.

1. Place the bar behind your neck, resting on your shoulders, as you do in a barbell back squat.

2. Hold the bar with both hands in front of you and arms extended.

3. Hold the bar vertically with an alternating grip.

All three versions of this exercise require the trainee to start with a slight bend in the knees, using this slight flex to initiate the twist to one side and then the other. Alternatively, use no leg or hip assistance and squeeze the twist slowly from side to side.

I once read the natural bodybuilding routine of a contestant in a local state competition. The only exercise listed for his abdominals was side-to-side twists. He used a weighted bar and did 200 repetitions almost every workout. Work your way up to that level with one of the Power Systems bars, and see if your abs don't get shredded!

Haven't tried using weighted bars yet? Now is your chance to get caught up!


Thursday, March 8, 2012

Is the Stud Bar Pullup Bar the Best Deal for the Home Gym?

Multiple Studbars in action.

If you have not heard of the Stud Bar pull-up bar, then let me brief you:

-Commercial grade 14 gauge steel.
-Triangulated gussets (it's put together well/very strong)
-Holds 600 pounds!
-Mounts into your ceiling joists.

This pull-up bar is the perfect addition to the garage/home gym, and is even endorsed by Greg Glassman, the founder of Crossfit. It is also showcased in photo galleries on their website in garage gyms everywhere.

The stud bar pull-up bar can be installed in ceilings from 8 to 10 feet high. It is 48" inches across and the bar diameter is 1 1/4". This is a well thought out piece of exercise equipment with a lifetime warranty, manufactured to withstand a beating and give you a great, primal workout. At under $150 dollars, it is the best value in the 'semi-permanent' pull-up bar category.

You can find more information here: Studbar Pullup Bar, or click on the link below the video:


Click here to learn more about the Studbar pullup bar.

Pullups are a great barometer for upper body strength, affecting the latissimus dorsi, biceps, wrist flexors and extensors, and even the pectorals, posterior deltoids and the abdominal wall. Don't worry if you can't do a pull-up yet, having the bar there will help you transition into one, even if you have to use a chair and do assisted pull-ups in the beginning.

If you are already proficient with pull-ups and like to do variations, including kipping pull-ups, muscle-ups and so on, your best option is a semi-permanent installation like the Studbar pull-up bar.

Visit here to see more pull-up bar options:

 Home Gym Pull Up Bars

Pullup Bars for the Home Gym

Learn more about pull-ups here: Proper pull-up technique